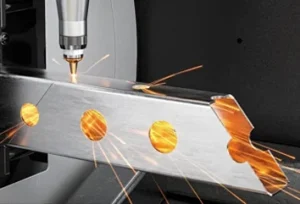
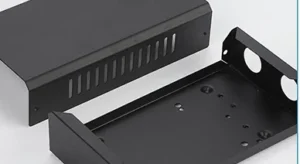
Acrylic cracking around mounting holes can reappear in a replacement panel if the mounting conditions remain unchanged. Before ordering another equipment window or access panel to the same drawing, establish when the damage was noticed, how the panel was fastened and what it experienced in service.
A crack beside a screw does not, by itself, prove overtightening. Nor does a laser-cut hole prove that cutting was the sole cause. Geometry, processing history, assembly loads and contact materials need to be considered together.
Quick answer: Check the crack timeline, hole alignment and clearance, fastener and support arrangement, edge distance, movement allowance, machining history and cleaning products. Confirm the replacement drawing and installation requirements together before releasing new parts for cutting.
This guide is for engineers and maintenance buyers reviewing equipment panels and viewing windows. It is a pre-replacement checklist, not a definitive failure diagnosis from photographs or a DIY crack-repair procedure.
If the panel serves a protective function: follow the equipment’s safe maintenance procedures and have the responsible party assess the damaged panel before further use. Do not tighten a cracked panel further to test a theory, or remove protection from operating equipment to obtain photographs.
Record When and Where the Cracks Appeared
Record when the damage was first noticed, not simply when the replacement was requested. The first observation may be later than the actual onset. Compare receiving photographs, assembly records and maintenance notes where available.
| First noticed | Information to review first |
|---|---|
| Before installation | Incoming condition, packaging, handling and processing records. |
| During fastener insertion or tightening | Hole alignment, contact with the fastener, support and assembly sequence. |
| After a period in service | Sustained loading, temperature changes, vibration and operating conditions. |
| After cleaning or product contact | Product identity, concentration, contact duration and material compatibility. |
| After repeated removal and refitting | Hole-edge damage, changed hardware and maintenance history. |
These are investigation prompts, not diagnoses. Record whether one hole or several are affected, whether the same location fails repeatedly and whether other panels from the same batch remain intact. Note where visible cracks meet the hole, countersink, cut-out or outside edge without assuming that the visible endpoint proves the origin.
Keep the drawing revision and part identity with the photographs. Comparing a failed panel with a sound panel is more useful when their material, hardware and service conditions are also known.
Check Hole Fit and Alignment Before Tightening
A screw passing through a hole does not establish a stress-free assembly. Review the actual hole size and position against the fastener, bracket and frame, rather than relying only on the nominal drawing dimensions.
- Did the holes line up without pushing, bending or pulling the panel?
- Was tightening used to draw the panel into position?
- Did a screw shank bear against one side of a hole?
- Were the specified spacers, washers and supports present?
- Does the installed arrangement match the approved drawing?
Do not enlarge every hole as a default remedy for acrylic screw hole cracks. A change can affect location, washer coverage and the material remaining near an edge. Any revised clearance must be considered with the complete mounting design and approved before manufacture.
The acrylic hole size, kerf and tolerance guide explains how to specify finished features. Here, the immediate question is whether the supplied feature and mating assembly created the intended fit.
Review the Fastener and Support Arrangement
Document the complete stack of components: screw head, washer or gasket, panel, spacer and supporting frame. Include countersunk features where present. Review how the clamping force reaches the acrylic and whether the panel is supported at the fixing point.
An uneven mounting face or missing spacer can make tightening bend the panel. A small or angled contact area can concentrate the load locally. Check the specified assembly method and any existing torque requirement; do not substitute an arbitrary universal torque or an instruction to tighten “by feel”.
PLEXIGLAS joining guidance, section 6, emphasises stress-conscious screw connections, avoiding excessive tightening and distributing forces. It also discusses movement allowance. These are useful review principles, not proof that a particular fastener caused an observed crack.
A washer, grommet or compliant element may be part of a suitable design, but adding one does not automatically solve an alignment or support problem. Its dimensions, material compatibility and effect on retention must also be reviewed.
Check Edge Distance and Space for Movement
Distinguish the distance from the hole centre to the panel edge from the remaining material between the hole boundary and that edge. Also check nearby cut-outs and corners. A dimension labelled simply “edge distance” can hide different interpretations.
Review whether several fasteners constrain the panel’s movement, whether clearance is available around its perimeter, and how installation temperature compares with service conditions. An acrylic panel and its metal frame need not respond identically to temperature changes.
The appropriate allowance depends on the sheet product, dimensions and mounting arrangement. Use the applicable material guidance and design requirements rather than copying a hole multiplier or expansion allowance from an unrelated application. Any fixed-point or sliding arrangement should be intentionally designed, not improvised by leaving random screws loose.
Illustrative assembly check
Consider a panel that reaches three mounting points freely but has to be flexed to reach the fourth. Recutting the same hole pattern without checking the frame and supporting faces leaves that mismatch unresolved. This is an example of what to investigate, not a diagnosis of every four-hole panel or a documented customer case.
Review Machining and Surface-Treatment History
Identify how the holes were produced and what happened afterwards: laser cutting, drilling, enlargement, countersinking, polishing, flame treatment or bonding. Record the acrylic grade, cast or extruded type where known, thickness and batch information.
For a laser-cut acrylic cracking enquiry, review the process history without assuming it explains the whole failure. ACRYLITE’s laser machining guidance describes heat-related edge stress and susceptibility to crazing under mechanical stress or exposure to incompatible solvents. It also shows why a glossy edge alone does not establish a low-stress condition.
Look for records or images of the hole edges before installation. Chips, notches or visible fine damage warrant review, but ordinary photographs cannot quantify residual stress. Appearance alone also cannot reliably separate every scratch, craze and through-crack.
Do not conclude that all holes must be switched to CNC machining, that cast acrylic cannot crack, or that annealing guarantees a solution. Process changes and any stress-relief treatment need assessment for the actual sheet and part; they should not be improvised on a damaged production component.
Check Cleaning Products and Other Contact Materials
Ask what touched the panel, not only how it was fastened. Provide the product name and relevant technical or safety information for cleaners, adhesives, sealants, thread-locking products and other contact materials.
- What concentration was used?
- How long did the product remain on the surface?
- How often was it applied?
- Could it reach a hole edge or remain trapped near a fastener?
- Were the product and panel combination approved for the application?
ACRYLITE’s fabrication guidance warns that incompatible materials, including cleaners, adhesives, sealants and gasketing or packaging materials, can be associated with crazing, cracking or discolouration. Compatibility therefore belongs in the review even when damage is concentrated at mounting holes.
Do not classify every alcohol-containing cleaner as automatically safe or automatically responsible. Check the specific product, acrylic grade and exposure conditions. A safety data sheet identifies hazards and ingredients but may not, by itself, establish suitability for a stressed acrylic assembly.
What Photos and Assembly Details Help the Review?
Prepare a small, labelled evidence package. Overall views establish context; close-ups alone can hide how the panel is supported.
- Photographs of the complete panel and installed location.
- Close-ups of affected holes, with a scale reference where practical.
- Both panel faces and the relevant frame or bracket.
- The screw, washer, spacer and support arrangement, when safely accessible.
- The current drawing, dimensions and material specification.
- Installation, cleaning and first-observation dates.
- Details of intact parts from the same batch or installation.
Preserve the damaged sample where feasible and identify any changes made after the problem appeared. Do not apply glue, heat or further tightening just to demonstrate a suspected cause. Those actions can change the evidence and introduce additional damage.
Photographs support discussion of replacement requirements; they do not constitute a laboratory failure analysis. If the cause remains uncertain or the consequences are significant, further investigation by an appropriately qualified party may be needed.
Confirm the Replacement Specification Before Recutting
Separate confirmed findings from proposed changes. Record what will change in the panel, what will change in the installation and what still needs verification. A new cutting file alone may not resolve acrylic panel mounting problems.
- Material: sheet product, grade, thickness and relevant service conditions.
- Geometry: outline, hole sizes and positions, edge distances and cut-outs.
- Mounting: support, spacers, fasteners, movement allowance and agreed installation method.
- Manufacture: processing route, hole-edge condition and appearance requirements.
- Use: temperature, contact chemicals, maintenance and handling conditions.
- Validation: sample checks, assembly review and any relevant observation or testing period.
Do not automatically specify a thicker sheet or substitute polycarbonate. A material change requires review of the complete application, including optical requirements, stiffness, impact demands, temperature and chemical compatibility. The acrylic material page is a starting point for material discussion, not approval for every equipment use.
Use the equipment panels and viewing windows RFQ guide to organise the revised drawing and acceptance package. For the cutting scope, send those requirements to the non-metal cutting service for review.
Agree who performs the trial assembly and any further testing. A sample that does not crack during installation has passed only that observation; it has not demonstrated every long-term temperature or cleaning condition. Where the panel has a protective role, fit and appearance do not replace the required safety assessment.
Frequently Asked Questions
Does cracking around a screw hole always mean overtightening?
No. Tightening is one item to review alongside alignment, support, movement allowance, processing history and chemical exposure. The crack location alone does not establish a single cause.
Will larger mounting holes prevent cracking?
Extra clearance may address a particular constraint, but it can also affect location, washer coverage and remaining edge material. Review and approve the complete mounting arrangement rather than enlarging every hole by default.
Can laser cutting contribute to acrylic cracking?
Laser processing can introduce edge stress, so it belongs in the investigation. This does not prove it caused a particular failure; assembly loads, surface condition and incompatible contact products may also matter.
Should a cracked acrylic panel be replaced with polycarbonate?
Not automatically. Review the optical, mechanical, environmental and manufacturing requirements before selecting a different material. A change of sheet does not necessarily correct a misaligned mounting system.
What is needed before making replacement panels?
Provide crack photographs, the mounting arrangement, drawing, material details and the sequence of events. Confirm revised part and installation requirements, then agree the sample and acceptance checks.
Review Your Replacement Acrylic Panel Requirements
Send crack photos, the mounting arrangement, material details and the current drawing. Include when the cracks appeared and any cleaning products used, so the replacement requirements can be reviewed before cutting.