Should a part be laser marked before or after coating and heat treatment? The answer depends on when the identifier is needed, what the later process does to the surface, and how the final mark will be accepted. A sequence that gives a clear logo may not preserve corrosion protection or produce a verifiable Data Matrix code.
Quick answer
There is no universal “before or after” rule. Marking after the final surface process usually gives the most predictable final contrast and position, but it may remove a coating, expose the substrate or disturb a passivated surface. Marking before coating or heat treatment can preserve manufacturing traceability, but the later operation may cover, oxidise, distort or reduce the contrast of the mark.
Mark as late as practical for final readability, but as early as necessary for manufacturing traceability. When both are required, use a controlled two-stage identification plan. For a drawing-based review, see our industrial laser marking and engraving services in Singapore.
Laser Marking Before or After Coating: Quick Decision Table
| Final part condition | Initial sequence to evaluate | Main risk to control |
|---|---|---|
| Bare metal | Complete the major cutting, forming, welding and surface preparation before the final mark. | Reflectivity, roughness, contamination, later polishing and heat input. |
| Heat-treated metal | Mark after heat treatment for final appearance; mark before only when the furnace or batch process needs identity. | Scale, oxidation, hardness, distortion and later descaling or grinding. |
| Anodized aluminium | Evaluate marking on the finished anodized surface when final contrast is required. | Anodic type, dye, sealing, colour, exposed aluminium and wear. |
| Powder-coated metal | Choose between a pre-coat recessed mark and post-coat removal or colour change based on the finish specification. | Coating coverage, substrate exposure, fumes, corrosion continuity and colour variation. |
| Passivated stainless steel | Confirm whether the controlled route is mark-then-passivate, passivate-then-mark, or mark followed by cleaning/re-passivation. | Surface contamination, passive condition, heat tint and the specified corrosion acceptance. |
| Data Matrix | Develop and verify the code in its final-use surface condition. | A successful scan is not the same as a specified verification grade. |
| In-process traceability | Apply an early process ID, then add or confirm the final customer mark later. | Maintaining the link between the early ID and final serialised record. |
Start With Why the Part Is Being Marked
The mark should be applied before the first operation that requires it, but after the last operation likely to destroy or invalidate it. That makes mark purpose the first decision—not laser settings.
A process identifier does not always need the same permanence, size or verification as the final customer code. Conversely, a permanent customer code should not be placed early simply because the blank is easier to load. If both identities are required, use a controlled two-stage method and maintain the relationship in the production record.
Before choosing the sequence, also define whether the required result is surface colour change, coating removal, shallow etching or deeper engraving. Our comparison of laser marking, engraving and etching explains why those terms should not be treated as interchangeable.
Marking Bare Metal After Final Surface Preparation
For an uncoated finished metal part, marking after the main manufacturing and surface-preparation operations is often the most predictable starting point. Cutting, forming, welding, blasting, grinding, brushing and polishing can alter a shallow mark or change the background reflectance that created its contrast.
The final surface still has to be controlled. Stainless steel, aluminium, titanium, brass and tool steel respond differently. A highly reflective face, directional brush, rough cast surface or curved part can change both perceived contrast and camera illumination. Cleaning residues and protective films should also be included in the process plan.
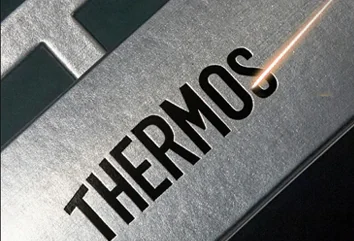
If the part will be polished or aggressively cleaned after marking, test whether the mark remains acceptable. A mark that is visually permanent in normal handling may not survive stock removal, abrasive finishing or repeated cleaning.
Laser Marking Before or After Heat Treatment
Heat treatment can change oxide colour, surface scale, hardness, dimensions and residual stress. Later descaling, shot blasting, grinding or machining may weaken or remove an earlier mark. For this reason, marking after heat treatment and final cleanup often gives the most controllable customer-facing result.
When marking before heat treatment makes sense
- The furnace batch must be linked to the part before loading.
- Similar parts could be mixed during heat treatment.
- The customer requires traceability through every manufacturing stage.
- A validated mark has already been shown to survive the exact atmosphere, temperature and cleanup route.
When marking after heat treatment makes sense
- The final contrast and machine readability are the primary requirements.
- Heat scale or oxidation would cover the original mark.
- The part is ground, blasted or machined after heat treatment.
- The mark must be positioned relative to the finished geometry.
Hardness after treatment can change the marking response, while an overly aggressive process may cause local melting, raised edges or unwanted heat input. Thin sections and distortion-sensitive parts require additional control; see our guide to minimising heat distortion when laser marking stainless steel.
Laser Marking Anodized Aluminium
Anodized aluminium can produce strong visual contrast, but the result is specific to the alloy, anodic process, dye, sealing condition, thickness, colour and laser wavelength. A parameter set approved for one black anodized panel should not be released automatically for another colour, supplier or coating class.
Marking the finished anodized surface allows the process to be adjusted against the actual background colour. Depending on the mechanism, the laser may modify, lighten or remove part of the anodic surface. If aluminium is exposed, the project must decide whether that is acceptable for appearance, wear and corrosion performance.
Marking bare aluminium before anodizing can support early identification, but chemical preparation, anodizing and dyeing may change the mark’s contrast or geometry. The completed part—not only the pre-treatment sample—must be inspected.
Specify these variables
- Aluminium alloy and temper.
- Anodizing type, colour, thickness and sealing condition.
- Whether removal of the anodic layer is permitted.
- Approved contrast range and cosmetic limits.
- Expected wear, cleaning and outdoor exposure.
- Whether the mark requires machine-readable verification.
Laser Marking Powder-Coated Metal
Powder-coated parts create three distinct marking routes. They should not be combined into a single claim that “powder coating can be laser marked”.
1. Recessed mark before powder coating
A sufficiently recessed mark may remain visible after coating, but the result depends on mark depth, geometry, powder chemistry, colour and finished film build. Coating can bridge small features or reduce contrast. This route needs a coated sample, not only a bare-metal depth measurement.
2. Remove coating after powder coating
The laser can remove coating to expose the substrate and create contrast. This may interrupt the specified protective system, especially in humid, washdown or coastal service. The drawing should state whether exposed metal is allowed and whether local sealing or another protective operation is required.
3. Change the coating appearance without full removal
Some coating systems may support a colour or surface change. Results vary with resin, pigment, colour, thickness and cure. A visually successful sample on one powder does not qualify a replacement powder or colour.
Laser interaction with an organic coating also requires suitable extraction and a review of coating information. Unknown coatings should not be processed until material and safety information are available. For the broader finish-selection context, see powder coating vs anodizing vs passivation for laser-cut parts.
Laser Marking and Stainless-Steel Passivation
Passivation is a controlled chemical treatment for suitably cleaned stainless steel surfaces. It is not a coloured coating. The process sequence should be agreed where corrosion performance, surface cleanliness or a formal passivation specification applies.
Marking after passivation changes the surface that was previously treated. Depending on the laser mechanism and corrosion requirement, the marked area may need cleaning, evaluation or re-passivation. Marking before passivation avoids disturbing an already accepted surface, but the chemical route can alter the appearance of a colour-based or shallow mark.
The correct route may therefore be:
- Mark, then passivate when the mark is validated through the specified chemical process.
- Passivate, then mark when final contrast is more important and the marked area is accepted as produced.
- Passivate, mark, clean and re-passivate where the customer specification requires the final marked surface to follow an approved treatment route.
Visual Contrast, Permanence and Machine Readability Are Different
A mark can look clear to a person and still perform poorly in a vision system. It can also decode once on a phone but fail the customer’s formal verification requirement. Acceptance should distinguish four separate properties:
| Property | What it answers | Typical evidence |
|---|---|---|
| Visual contrast | Can a person distinguish the mark from the background under defined viewing conditions? | Approved sample, appearance standard or controlled visual inspection. |
| Permanence | Does the mark survive the expected abrasion, cleaning, temperature and environment? | Project-specific durability test before and after exposure. |
| Decode | Can the intended scanner or camera read the encoded data? | Read test using the specified production device and setup. |
| Symbol quality grade | Does the code meet the required measurement standard and grade? | Report from the specified compliant verifier, illumination and method. |
ISO/IEC 29158:2025 defines a quality-test method for direct part marks, including modified measurement and illumination conditions. A normal scanner is designed to decode; it is not automatically a compliant verifier. See our guide to verifying laser-marked Data Matrix codes.
Serial numbers, Data Matrix codes and logos need different rules
| Mark type | Important requirements |
|---|---|
| Serial number | Correct characters, sequence control, legibility, orientation, position and duplicate prevention. |
| Data Matrix | Encoded data, module size, quiet zone, geometry, contrast, reader environment and required verification grade. |
| QR Code | Data content, size, quiet zone, damage tolerance and intended reader. |
| Logo | Artwork revision, proportions, cosmetic quality, position and approved sample. |
| Process ID | Survival through the next operations and an unbroken link to the production record. |
For code architecture, variable data and mark selection, review our guide to permanent QR Code, Data Matrix and serial number laser marking.
Marking Depth, Part Stress and Surface Damage
“Permanent” does not always mean “deep”. Annealed colour change, shallow surface modification, coating removal and deep engraving create different geometry and thermal effects. The correct process depends on material, lifecycle and whether material removal is allowed.
Deep engraving can introduce a local notch, reduce a thin wall or create a stress concentration. High-energy processing may also produce raised edges, recast material, local distortion or unwanted surface change. These risks matter near:
- Fatigue-critical regions.
- Bends and formed radii.
- Sealing or bearing faces.
- Thin webs and membranes.
- Press fits and precision datums.
- Edges, holes and highly stressed fastener locations.
The drawing should identify no-mark zones, allowed material removal, maximum depth where relevant and minimum distance from critical geometry. Our detailed guide to laser engraving depth, tolerance and readability explains why a deeper mark is not automatically a better mark.
When a Production-Representative Sample Is Required
Sample testing is especially important when any of the following changes:
- Material grade, heat-treatment condition or supplier.
- Powder chemistry, coating supplier, colour, texture or thickness.
- Anodizing type, dye colour or sealing condition.
- Passivation or cleaning sequence.
- Code size, data content, module size or marking location.
- Laser wavelength, optics, fixture or production orientation.
- Reader, verifier, lighting or acceptance grade.
- Expected abrasion, cleaning, heat or corrosion exposure.
The sample should use the intended production material, final surface, mark position and encoded data density. Test it with the actual reader or verifier under representative lighting. If durability matters, evaluate the mark again after the specified exposure rather than approving it immediately after marking.
How to Specify the Mark on a Drawing and RFQ
“Laser mark here” does not define a production or inspection requirement. Provide the following information where applicable:
Lumen Future can review the marking stage together with the drawing, material, coating and traceability requirements. Heat treatment or finishing may be completed directly or coordinated with a suitable processing partner, depending on the project scope and required documentation. The quotation should state the included processing, sampling, verification and reporting scope.
Frequently Asked Questions
Should laser marking be done before or after powder coating?
It depends on the required result. A pre-coat recessed mark must remain legible through the finished film. Post-coat marking may remove or modify the coating and could expose the substrate. Test the actual powder, colour, thickness and service requirement before release.
Can anodized aluminium be laser marked?
Yes, many anodized aluminium surfaces can be laser marked, but contrast and durability depend on the alloy, anodizing type, colour, sealing, coating thickness and laser process. Confirm whether removal of the anodic layer is permitted.
Should stainless steel be passivated before or after laser marking?
Either sequence may be appropriate. Marking after passivation changes the treated surface, while passivation after marking may change the mark appearance. A corrosion-critical specification may require marking followed by cleaning or re-passivation.
Will heat treatment remove a laser mark?
Heat treatment may oxidise, cover or change the contrast of a mark, and later descaling or grinding may remove it. A validated deep mark may remain, but the exact furnace atmosphere, temperature and cleanup route must be tested.
Does a readable Data Matrix automatically pass verification?
No. A successful decode confirms that one device read the code under one condition. A required symbol-quality grade must be measured with the specified verification method, illumination and compliant equipment.
Can deep laser engraving weaken a metal part?
Material removal can reduce a thin section or create a local notch. The risk depends on depth, geometry, load, fatigue requirement and mark location. Keep deep marks away from critical stress, sealing and precision surfaces unless the design has been approved.
Review the Marking Sequence Before Production
Send the drawing, material, heat treatment, final coating or passivation specification, mark data, quantity and acceptance requirement. We can review process order, sample testing and inspection before the production sequence is released.
Technical references: ISO, ISO/IEC 29158:2025—Direct Part Mark Quality Test Specification; GS1, GS1 DataMatrix Guideline and GS1 DataMatrix Verification Guidance; ASTM International, ASTM A967/A967M—Passivation Treatments for Stainless Steel Parts. Final sequence and acceptance depend on the actual material, finish and customer specification.