As acrylic becomes thicker, the laser must maintain sufficient energy through a deeper cut while keeping the molten edge stable. This usually increases the risk of edge taper, vertical striations, bottom-edge waviness, a wider kerf, local haze and heat accumulation. Thick acrylic can still produce a polished-looking edge, but the result depends on the exact acrylic grade, actual thickness, laser power, lens, focus position, cutting speed, frequency, table support, geometry and extraction. Thickness alone does not determine quality.
A supplier may describe two parts as “laser-cut acrylic,” while one has a uniform glossy edge and the other shows taper, vertical lines or a rough lower edge. The difference is not necessarily a simple good-versus-bad machine comparison. A deeper cut changes the optical and thermal conditions throughout the material, and a cosmetic edge may require a different process strategy from a functional locating edge.
This guide explains how thickness affects laser-cut acrylic edge clarity, gloss, striations, taper, kerf and dimensional performance. It is intended for engineers and buyers specifying displays, signs, equipment covers, machine windows, fixture plates and transparent panels in Singapore. For a broader introduction, see our acrylic laser cutting guide.
Why a Thicker Acrylic Cut Is More Difficult
A CO2 laser does not create an infinitely straight, constant-width cut. The beam converges towards a focal region and then diverges. Heat must be delivered through the full sheet thickness, while vapour and molten material leave the cut channel. As the channel becomes deeper, the margin for focus error, insufficient energy and trapped heat becomes smaller.
Beam Focus, Kerf and Edge Taper
The narrowest region of a focused laser beam is limited in depth. In thin sheet, more of the cut may remain close to that effective focal region. In thick sheet, the top, middle and bottom cannot all experience exactly the same beam diameter. This can produce a difference between the top and bottom kerf and an angled cut wall.
Focus position and focal length therefore influence whether the upper edge, lower edge or overall wall straightness is prioritised. Longer focal-length optics can provide a different depth-of-focus behaviour, but they also change the energy density and machine setup. A parameter from another laser model should not be copied as a guaranteed Lumen Future setting.
Edge taper must be separated from general part tolerance. A profile can measure acceptably at the top surface while a slot becomes narrower or wider through the thickness. If the edge is a locating face, a bonding surface or part of an interference fit, state where the dimension is to be measured and whether wall angle is controlled.
For hole, slot and compensation design, see our acrylic kerf, minimum hole size and tolerance guide.
Heat Input Changes with Thickness
Thicker acrylic generally requires more effective energy through the cut. Depending on the equipment, material and geometry, that may involve power, speed, frequency, lens and focus changes. Moving too quickly may leave an incomplete lower edge. Moving too slowly can widen the kerf, soften small features, increase waviness and raise the risk of a flare-up.
This is why a universal watts-per-millimetre formula is inappropriate for buyer documentation. Rated laser power does not describe beam quality, optical condition, focal length, motion, extraction or the exact acrylic product. A validated parameter set belongs to a defined combination of machine, material, thickness and quality requirement.
Melt Flow, Extraction and the Bottom Edge
During cutting, heated material and vapour must leave the kerf. A deeper channel makes that flow less uniform. If smoke and heat remain in the cut, the lower region may show waviness, pits, re-deposition or a different gloss from the top. Exhaust flow, nozzle arrangement, table openness and the amount of uncovered table area can all influence the result.
Support and reflection also matter. A lower edge may be locally marked where the part sits on a table element or where reflected energy reaches the sheet. Small cut-outs may move, tip or trap heat after they separate. As a result, a large outer contour and a dense pattern of small holes in the same thickness should not automatically receive the same edge-quality expectation.
Thickness Does Not Act Alone
| Thickness condition | Typical edge behaviour | Main process concern | Buyer action |
|---|---|---|---|
| Thin relative to the qualified process | Easier to keep a uniform edge through the depth | Excess heat, small-part movement and fragile narrow features | Define the cosmetic face and critical small features |
| Medium relative thickness | Focus sensitivity, striations and slight taper become easier to see | Power, speed, frequency, real thickness and cut order | Approve the real grade and a representative edge where appearance matters |
| Thick relative to the process | Greater risk of taper, bottom waviness, wider kerf and heat accumulation | Lens, focus depth, extraction, support and cycle time | Request a sample or first article before production |
| Very thick or mechanically critical part | Polished appearance and dimensional requirements may conflict | Laser may not be the most controllable or economical route | Compare CNC routing, sawing and post-finishing |
“Thin” and “thick” are relative to the machine, laser power, lens, acrylic grade, geometry and acceptance standard. They are not universal material limits. A supplier should not promise the same edge on every colour, grade and thickness merely because one clear acrylic sample cut well.
What “Good Edge Quality” Should Mean
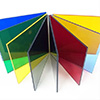
Calling an edge “polished” is not enough for engineering approval. A glossy edge can still have taper, a visible start point or dimensions that vary through the thickness. Define the attributes that matter to the application.
Inspection lighting matters. A transparent edge viewed against a dark background, under backlighting or next to an illuminated sign can reveal marks that are invisible in ordinary room light. If visual quality is critical, agree on the viewing direction, lighting, distance and representative acceptance sample.
Diagnosing Common Thick-Acrylic Edge Defects
| Observed defect | Possible causes | What should be reviewed |
|---|---|---|
| Frosted or cloudy edge | Material grade, heat balance, airflow, contamination or masking | Product identity, parameters, protective film and extraction |
| Heavy vertical lines | Speed-frequency balance, unstable motion, focus or material response | Parameter set, motion path, lens and actual thickness |
| Bottom-edge waviness | Focus location, insufficient energy at depth or poor melt removal | Focus, lens, power-speed balance, support and extraction |
| Wide kerf | Excess heat input, slow motion or repeated passes | Speed, power, frequency and feature spacing |
| Strong edge taper | Beam divergence, lens selection, focus position or process limitation | Wall requirement, optics and alternative cutting route |
| Local burn mark | Heat accumulation, flare-up, reflection, cut order or contamination | Geometry sequence, table, extraction and optics condition |
| Incomplete lower cut | Insufficient energy, focus error, warped sheet or thickness variation | Actual material, flatness, focus and validated process window |
| Crazing after cutting | Residual stress, incompatible cleaner, bending or fastener load | Material history, post-processing chemicals and assembly design |
These are possible causes, not one-to-one diagnoses. Changing a setting to solve one defect can create another. For example, slowing the laser may complete the lower cut but increase kerf and heat accumulation. A controlled trial should evaluate the whole edge and finished part rather than one photograph.
Nominal Thickness vs Actual Thickness
The thickness written on a purchase order is nominal. Real sheet thickness can vary with manufacturer, product family, production method and location across the sheet. That variation can influence focus, kerf, cut-through behaviour and mating fits, especially when a parameter set was established near the edge of its process window.
Cast and extruded acrylic also differ in manufacturing history and thickness consistency, but neither label by itself guarantees a specific edge. Both can produce polished-looking laser-cut edges under suitable conditions. The exact product, colour, additives, thickness and process determine clarity, gloss and repeatability.
If thickness is functional, state the required finished thickness or approved sheet specification instead of assuming a nominal catalogue value. For the wider material decision, read cast vs extruded acrylic for laser cutting.
Is One Pass Better Than Multiple Passes?
Multiple passes are not an automatic solution for thick acrylic. The second path may not interact with the partially formed kerf in the same way as the first. Repeated heating can widen the cut, create a stepped wall, increase haze or leave a different lower-edge pattern. Alignment, movement of separated parts and trapped heat add further variation.
A single validated pass may provide a more consistent polished-looking edge when the laser, lens and material are suitable. In other cases, a different process may be safer or more controllable. Buyers should specify the required result, not demand a particular pass count without process evidence.
Geometry Can Matter as Much as Thickness
A long open contour allows heat to move differently from a cluster of small holes. Dense nesting, repeated corners, narrow bridges and closely spaced paths can soften local material even when the overall sheet is not unusually thick. Cut order and lead-in location may become visible on cosmetic edges.
For thick parts, identify:
- Small holes and narrow slots that have a functional purpose
- Sharp internal corners that could concentrate heat or stress
- Closely spaced cuts that leave a narrow web
- Visible edges and hidden assembly edges
- Bonding faces that require controlled geometry
- Areas where a lead-in or start mark is unacceptable
When CNC Routing May Be More Suitable
Laser cutting is attractive when a polished-looking visible contour and complex 2D geometry are the priorities. CNC routing becomes more attractive when a thick acrylic part needs a vertical functional wall, pockets, counterbores, controlled holes or a machined bonding surface.
| Requirement | Laser first | CNC first |
|---|---|---|
| Glossy visible 2D contour | Strong candidate after material validation | Requires a finishing step for similar gloss |
| Complex decorative outline | Strong candidate | Possible, but tooling and small radii matter |
| Functional vertical wall | Review taper and thickness | Usually the stronger starting route |
| Counterbore or pocket | Not a normal 2D laser feature | Preferred |
| Tight hole geometry | Test and define measurement plane | Preferred when the hole is mechanically critical |
| Thick cosmetic edge | Approve a representative sample | Route, then polish if required |
| One-step polished appearance | Possible when the process is qualified | Normally requires post-finishing |
For a full process comparison, see laser cutting vs CNC routing for acrylic. The best route can also combine CNC features with a separately finished cosmetic edge.
Specifying Thick Acrylic Parts in Singapore
Singapore projects commonly use acrylic for retail displays, illuminated signs, exhibition components, equipment covers, machine windows, semiconductor equipment panels and fixtures. Local optimisation begins with the actual stock and acceptance requirement—not simply adding “Singapore” to the material description.
Confirm whether the production sheet will use the same manufacturer, grade, colour and thickness as the approved sample. For large or heavy panels, packaging can be as important as cutting: protective film, separators, corner protection and handling instructions help prevent scratches and chipped corners during local delivery.
For cosmetic parts, state which face and edges are visible, whether the protective film should remain, and whether the edge will be viewed under backlighting. For fitted equipment panels, provide the mating model, fastener design and assembly clearance. For repeat orders, define whether a change of sheet manufacturer or material batch requires approval.
A Practical Approval Workflow
RFQ Checklist for Acrylic Edge Quality
Send these details with the drawing
- Acrylic manufacturer and grade
- Cast or extruded
- Colour, tint and optical finish
- Nominal sheet thickness
- Functional thickness requirement
- Overall part size
- Quantity and repeat volume
- Cosmetic face and visible edges
- Required edge clarity
- Acceptable striation appearance
- Edge taper requirement
- Measurement plane
- Functional holes and slots
- Mating-part information
- Minimum corner radius
- Masking instructions
- Engraving requirement
- Adhesive bonding after cutting
- Inspection method
- Sample or first-article approval
- Packaging requirement
- DXF, STEP and PDF revision
- Singapore delivery destination
Frequently Asked Questions
Does thicker acrylic always have a poorer laser-cut edge?
No. Thick acrylic can produce a polished-looking edge when the material, laser, lens, focus, motion and extraction are suitable. Thickness generally narrows the processing window and makes taper, lower-edge variation and heat accumulation more likely.
Why does thick acrylic develop edge taper?
The focused beam changes diameter through the cut depth. Lens choice, focus location, beam characteristics and melt removal influence the difference between the upper and lower kerf.
Why can the bottom edge be rougher than the top?
Less effective energy at depth, trapped heat and vapour, table reflection, support points and incomplete material removal can all affect the lower edge.
Can thick acrylic still have a clear polished edge?
Yes, but the achievable clarity and consistency must be qualified for the actual grade, colour, thickness, geometry and equipment. Approve a representative edge when appearance is critical.
Is there a universal maximum thickness for acrylic laser cutting?
No. A practical limit depends on machine power, optics, beam delivery, material, geometry, fire control and the required edge and dimensional quality.
Is one slow pass better than several passes?
Not automatically. One qualified pass may produce a more uniform edge, while excessive slowing increases heat risk. Multiple passes can widen or step the kerf. The route should be validated rather than selected by a universal rule.
Does cast or extruded acrylic cut better when thick?
Both can produce good edges, but they respond differently and individual products vary. Use the exact production sheet for process approval rather than relying only on the cast or extruded label.
Why do vertical lines appear on the cut edge?
Visible striations can be influenced by power-speed-frequency balance, focus, machine motion, material response and cut depth. Fine regular texture and coarse waviness should not be treated as the same condition.
Does thicker acrylic require a wider kerf allowance?
Kerf may change with thickness and process settings, but the supplier should measure a validated process rather than apply a fixed generic allowance. The drawing should normally describe the intended finished geometry.
When should thick acrylic be CNC routed?
Consider routing when wall verticality, critical holes, pockets, counterbores, bonding faces or dimensional control matter more than a one-step glossy laser edge.
Can a glossy edge still be dimensionally inaccurate?
Yes. Gloss describes appearance, not kerf compensation, taper, hole position, wall angle or overall tolerance. Cosmetic and dimensional acceptance should be specified separately.
How should edge quality be specified on a drawing?
Identify visible edges, clarity or gloss expectations, permissible process texture, taper if functional, the measurement plane and any approved sample or first-article requirement.
Should buyers approve a sample before production?
A sample is recommended when the sheet is thick relative to the process, the edge is highly visible, the material is new, or the edge performs a mechanical or bonding function.
Does acrylic colour affect thick-sheet cutting?
It can. Pigments, additives, surface finishes and reflective layers change energy absorption and appearance. A clear-sheet parameter is not automatically valid for every colour.
How should thick acrylic parts be packaged?
Keep suitable protective film where approved, separate parts to prevent rubbing, protect corners and visible edges, and define orientation or handling instructions for large panels.
Technical references
Need an Acrylic Edge Reviewed?
Send the acrylic grade, nominal thickness, drawings, quantity, visible-edge requirements and mating details. Lumen Future can review the geometry, process route and sample requirements before quotation and production.